Your email signature can serve as a digital business card that you attach to the end of every email you send. You can build your signature to contain valuable contact information to share with the people that you interact with online, such as your name, phone number, office address, website, etc. You can even include images in your signature! For this week’s tech tip, we’ve put together a step-by-step tutorial for creating your email signature in Microsoft Outlook 2013, complete with screen shots to help you keep up.
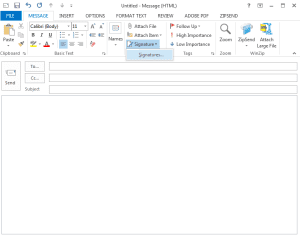
1. In your mailbox, create a new message. On the tab that says MESSAGE at the top, find the group that says Include, and within that you’ll find the Signature tool. Click the Signature tool.
2. A window will pop up titled Signatures and Stationery, and you’ll be on the E-mail Signature tab. Click the New button located beneath the Select signature to edit area.
3. Another window will pop up, this one is titled New Signature.
4. Enter the name for your new signature, and click OK.
5. In the Edit signature area, input the text that you’d like to include in your email signature. Usually this would include a closing salutation (I used “Best Regards,” for mine), your name, and whatever contact information you wish to include.
*You’ll notice that in the top right corner of the window, beneath Choose default signature, it used to say “(none)” next to “new message,” but now it says your new signature’s name. If this will be the only signature you use, you can leave this setting, and your signature will automatically insert itself into the end of every new message you create. Otherwise, you can click the drop down menu and select (none), and you can manually select your signature when you want to insert it.
6. Using the formatting tools, you can change the font, size, color, etc. of your text.
7. Once you’ve formatted your signature to your liking, you can also add an image. Click the image button located next to the words Business Card.
8. The Insert Picture window will pop up next, which will prompt you to locate the image you wish to include in your signature.
9. When you’ve found the image, select it and click Insert.
10. The pop up window will close, and the image will be inserted into your signature. Now that you’ve finished creating your signature, click OK in the bottom right hand corner of the window. Your signature will save automatically.
11. Now that you’re back in your new message, click Signature again, and you’ll notice that the name of your new signature appears in the drop down menu.
12. Click your new signature’s name, and it will be inserted into your email.
And there you have it! How to create your email signature in Microsoft Outlook 2013! If you have any questions, feel free to tweet to us at @TCIIT or reach out on Facebook!


